To follow along with these examples, download the files used here.
Introduction
This post covers three different methods to model ramps in Pyrosim, including two methods on using Sketchup and Sketchup extensions to model ramps.
Ramp Example 1: Native Pyrosim Creation
This example shows how to draw a ramp in PyroSim, using triangular slabs to approximate the geometry.
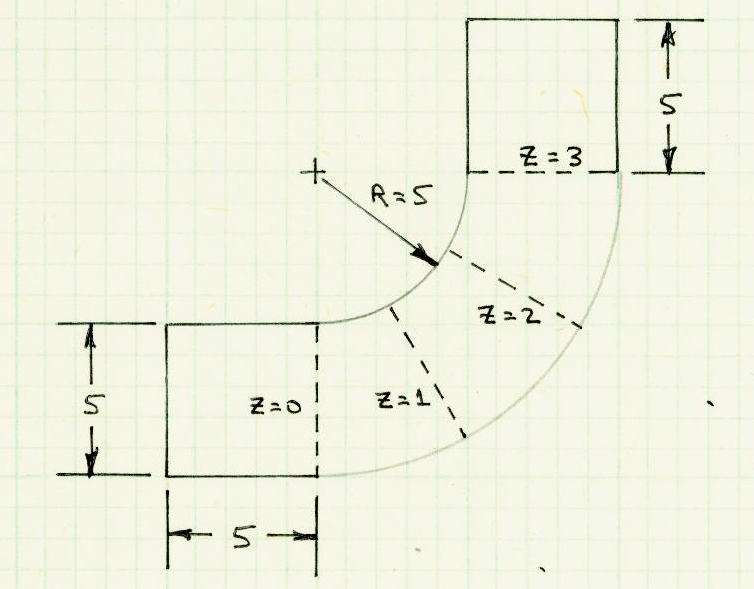
The geometry of the ramp we will model is shown in Figure 1.
It rises from Z = 0m to Z = 3m.
The basic idea is that we will sketch the geometry using triangular slabs and then we will edit the Z coordinates of the slabs.
The video below demonstrates the following steps:
- Import an image for sketching.
- Make a flat model of the geometry using slabs. For the slabs that will represent the ramp, use triangles.
- Edit the Z coordinates of the slabs to approximate the ramp.
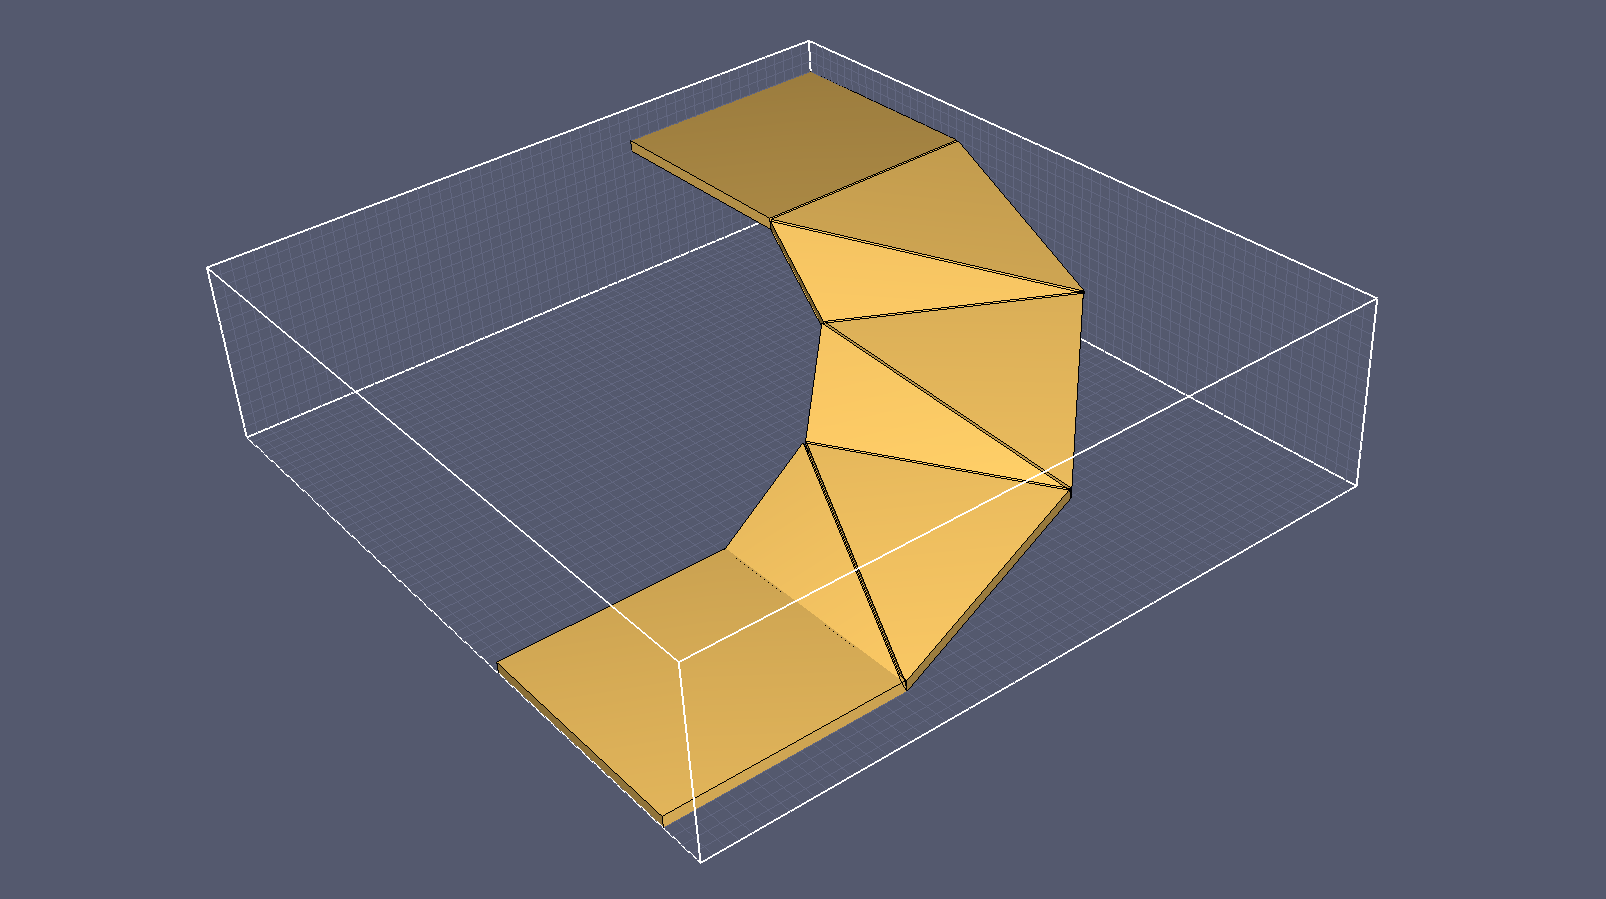
The final model will approximate the geometry with slabs shown in Figure 2.
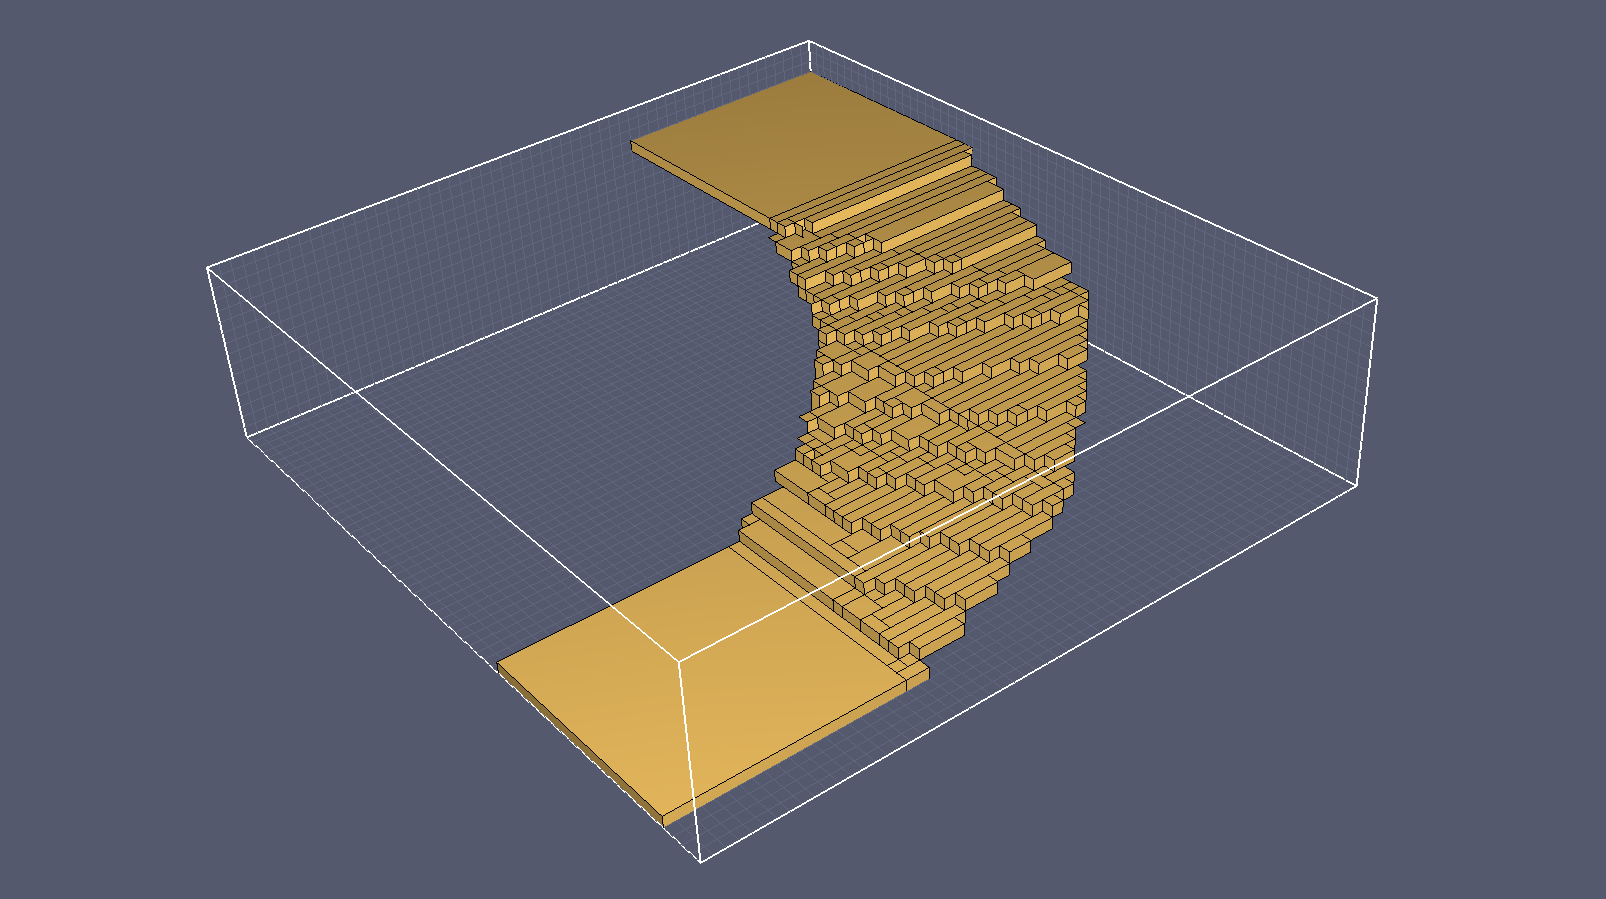
PyroSim rasterizes the slabs so that they conform to the grid-based geometry used by FDS, shown in Figure 3.
Ramp Example 2: Curved Ramp in Sketchup
In the second example, we build a curved ramp in SketchUp.
To follow along with this example, you will need to download SketchUp.
Ramp Example 3: Curved Ramp in Sketchup - Curviloft Extension
In the third example, we build a similar curved ramp in SketchUp, except this time we use the Curviloft extension to change the width of the ramp as it transitions from the bottom to the top. This update is in response to a question on the original youtube video above.
To follow along with this example you will need to download SketchUp, the SketchUp Eneroth Upright Extruder Extension, and the Curviloft Extension. Note that the Curviloft extension requires the LibFredo6 Extension be installed first.
To download the most recent version of PyroSim, please visit the the PyroSim Support page and click the link for the current release. If you have any questions, please contact support@thunderheadeng.com.
Related Tutorials
Tutorial demonstrating how to make ramps in Pathfinder.
Video tutorial demonstrating how to fix geometry problems related to DWG importation.
In this tutorial we show how to fix three problems that can occur when BIM (Building Information Modeling) or CAD (Computer-Aided Design) models into Pathfinder.
Tutorial to experience the fundamental features of Pathfinder with a mixed purpose multi-floor building
Tutorial demonstrating how to create a model from a blueprint image.
(Legacy) Tutorial to experience the fundamental features of PyroSim
Video tutorial demonstrating how to avoid creating unwanted gaps in the geometry of a Pathfinder model.
Tutorial demonstrating how to import IFC files to Pathfinder.