To follow along with this tutorial, download the relevant files here.
Introduction
The FDS validation suite compares FDS (Fire Dynamic Simulator) results with experimental data. These examples cover most of the features available in FDS. When you want to use a new feature in FDS, you can speed your learning by reviewing how the feature was used in a validation example.
The video and post below covers several such validation examples and how to quickly import FDS models into PyroSim.
You can download the NIST Validation Guide here. Read the guide and find a problem that you would like to run. Figure 1 is an image showing some of the content of the guide, as you can see these are useful examples.

Once you decide on a problem, download the FDS input file. To do this:
- Visit the FireModels Validation Folder on Github, shown in Figure 2.
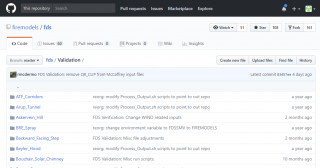
- Find the problem you want to use. The name typically is the name of the experiment used to obtain the results. For this example, we will select the first example, ATF_Corridors.
- Click the FDS_Input_Files folder.
- Click the specific case you want to run. We will select the ATF_Corridors_240_kW.fds case. This will open a listing of the input data.
- Click the Raw button, shown in Figure 3, to select the Raw view of the FDS data.
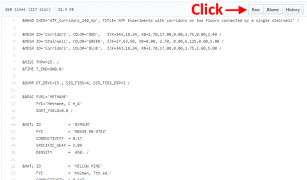
- Save the raw file as an FDS input file.
In this case, we give the name
ATF_Corridors_240_kW.fds.
Now start PyroSim.
- On the File menu, click Import FDS/CAD File. Select ATF_Corridors_240_kW.fds. Select the FDS version, in this case FDS6, and click OK. This will start the import process.
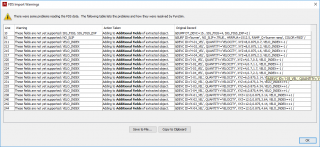
- PyroSim supports most FDS options directly in the user interface, however, there are some less frequently used options that must be input manually. Nearly all input dialogs include an Advanced tab, where the user can type the parameter name and value in the Additional Fields section. PyroSim includes this data when writing the input record. During file import, a warning message will be given for any field that is not supported and the action taken by PyroSim to resolve the issue. In this example, the fields SIG_FIGS, SIG_FIGS_EXP, NO_SLIP, and VELO_INDEX are not supported. PyroSim added the parameters to the Additional Fields section. Click OK to close the FDS Import Warnings dialog.
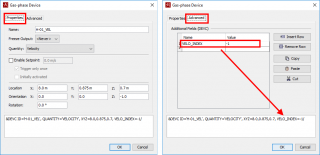
- The gas velocity measuring device H-01 included the VELO_INDEX parameter. In the figure below, we see that the parameter was added to the Additional Fields section and is written as part of the FDS input record.
The model Record View displays highlighted records of the input file that will be sent to FDS.
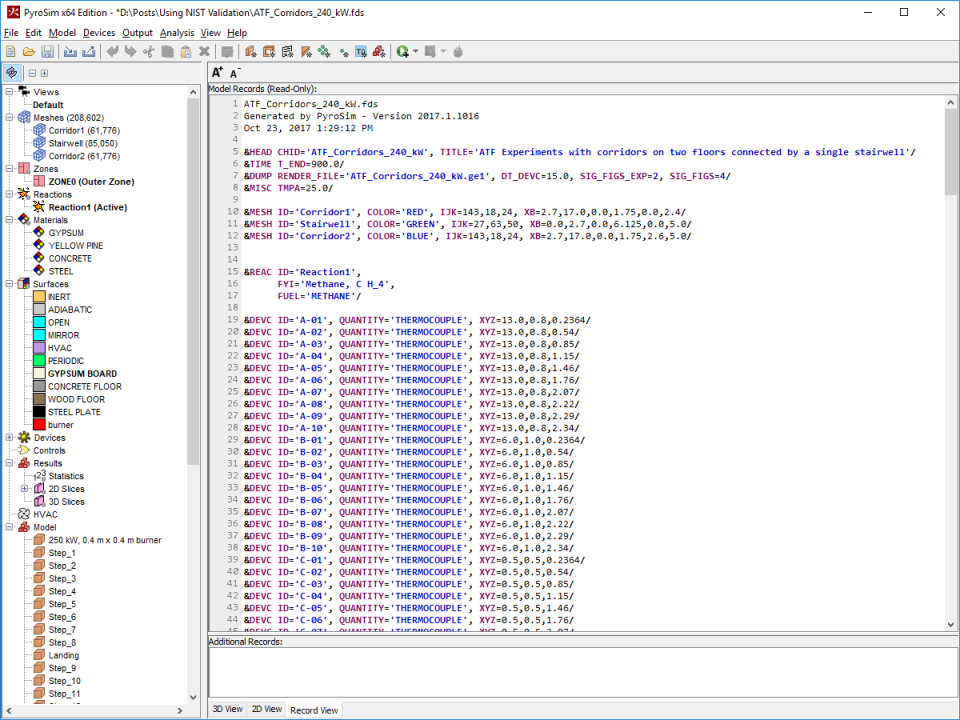
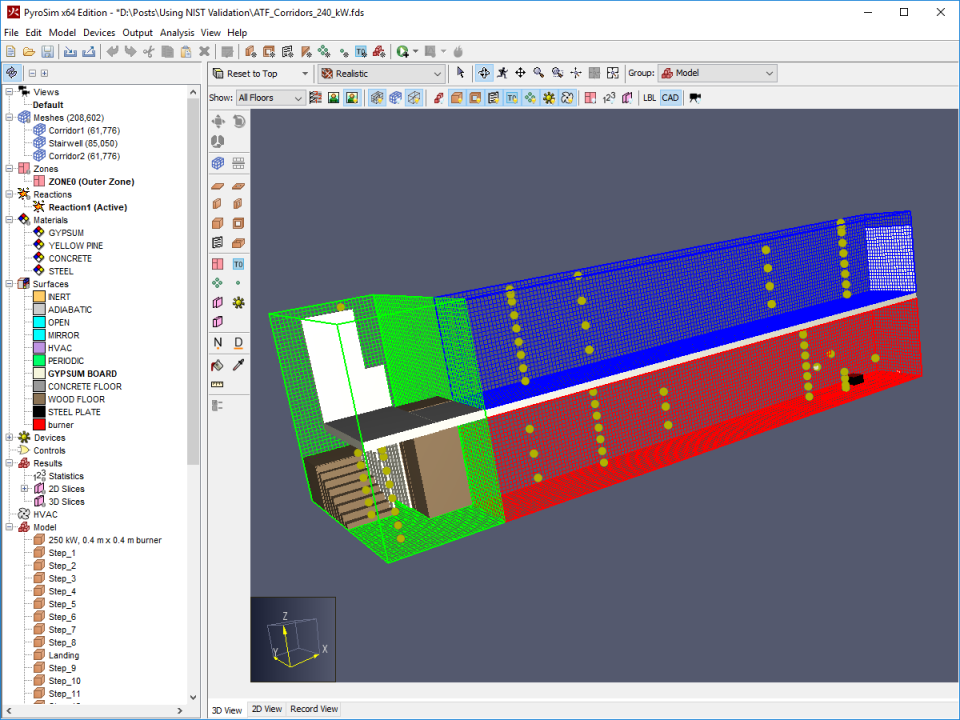
Figure 7 is a picture of the imported model, ready for simulation. Since there are three meshes, we can speed the solution by using clicking Run FDS Parallel on the Analysis menu (For more on this feature, take a look at the Assign FDS Meshes to Specific MPI Processes tutorial).
To download the most recent version of PyroSim, please visit the the PyroSim Support page and click the link for the current release. If you have any questions, please contact support@thunderheadeng.com.
Related Tutorials
(Legacy) Tutorial to experience the fundamental features of PyroSim
Video tutorial demonstrating how to fix geometry problems related to DWG importation.
In this tutorial we show how to fix three problems that can occur when BIM (Building Information Modeling) or CAD (Computer-Aided Design) models into Pathfinder.
Tutorial to experience the fundamental features of Pathfinder
Tutorial demonstrating how to model ramps three different ways and how to import sketchup geometry in PyroSim.
Tutorial demonstrating how to make ramps in Pathfinder.
Tutorial demonstrating how to create a model from a blueprint image.
Create a Ventus model by importing 3D CAD models.